*** Interested in more resources like this? Every Monday, I share a newsletter with a collection of Tech You Can Do resources. Interested? Sign up here! ***


I'm going to focus more on the student thinking aspect of this project. I was lucky enough to go to a workshop about Gemini this week and had a great conversation with a PLN friend from another part of Ohio. We got to talking about using AI in the classroom and he referred to teachers concern about students still DOING the thinking and how we tackle that. I shared an overview of the activity I did with John Spencer's writing prompts and how I feel activities like this can help teacher avoid AI generated content.
Sure, my students 100% could have fed the video into an AI tool and it would have spit something back out. BUT ... here's the key to where I believe students wouldn't reach for AI ...
#1 - they had 100% choice in which prompt to respond to
#2 - they had 100% choice over the tool/design they used for their final project
#3 - I required them to converse with peers about the expectations of the prompt
#4 - I required them to converse with peers about how they'd be graded, down to how many points each rubric element was worth
#5 - peer feedback was built in to the project timeline
#6 - they graded themselves with an explanation before I did and reflection was required
The student choice on their topic wasn't super new to them, but they struggled when they were allowed to choose their tool. We had an entire conversation around what tools are available and what might work or not work for each prompt. Talking through that helped quite a few of them ... some still needed more guidance, but it helped.
I saw struggle - and perseverance - kick in with the conversations around the expectations. It was shocking to ME how tough it was for them to really understand what the prompt was asking them to do. I realized how little practice they have ever had with this. They are so used to being told exactly what to do and how to do it.
THE toughest part of this activity was when it came down to them talking about the grading rubric. I told them this project was worth 50 points. THEY needed to decide where they felt these points should be assigned --> what was the criteria and how many points. Wow! The complete randomness they assigned points really opened my eyes. Either they think teachers have some magical training in rubric math or they have zero clue 😁 .
I know a lot of teachers have students reflect on their work, but doing it in addition to them grading themselves was enlightening. They didn't just choose points, they had to explain their point value. Quite a few of them were harder on themselves than I would have been.
When I think about this, it feels like a very overwhelming project, but honest and truly it wasn't. I posted links in our LMS for the prompts, had the conversations planned, provided the generic "what is required for your prompt" half-sheet, and the rubric worksheet ready, but otherwise, it was work and think time in class. If they chose to - or felt they needed to - they could work on it outside of class.
Lots of student thinking - lots of AI proofing - but this was a project the kids very much enjoyed! I had to "close the chapter" on this project for a lot of them because they wanted to continue working on them ... while it made me very happy, sometimes we have to recognize we can fiddle and adjust and never feel "done".
If you are interested in the student components I've talked about, I've added them to my Templates for Teachers blog where I share all the items others can make their own copies and use "as is" or make modifications and customize. You can find it here: John Spencer Writing Prompts activity
*** Every Monday, I share a newsletter with a collection of Tech You Can Do resources. It is delivered right to your inbox. Interested? Sign up here! ***

I turned to my favorite "tech extraordinaire" ... Eric Curts! He has so many amazing Google Sheets activities. I had been using one of Google's Applied Digital Skills lessons previously, but I felt like it was a little dry for my 6th graders, so I collected several of Eric's Sheets activities and really looked at what skills I wanted to focus on and then chose Sheets that worked with the selected skills. I put together a teacher version and a student version to make it easier for me to see what skills should be focused on on which sheet.
I present: Google Sheets ... Teacher workbook & Google Sheets ... student practice! It's posted on my connected blog, Templates for Teachers, so you can also browse for other activities for your classroom. I don't dig into complex Sheets formulas - most of it is on the basic level. My students haven't had much experience with Sheets - most couldn't even remember ever using it.
Sheets doesn't have to be an overwhelming tool - it is a powerful tool, that with some learning, can be beneficial to have at your fingertips. The "Directions" tab was a great way to start and probably the tab we spent the most time on. Laying this strong foundation was a great starting point. I'm definitely using it again!
If you use it - will you let me know how it goes? I'd love to hear feedback.
*** Every Monday, I share a newsletter with a collection of Tech You Can Do resources. It is delivered right to your inbox. Interested? Sign up here! ***

One of the units I cover with my 6th graders is Google Sheets. Most of them have had very little exposure to Sheets at this point. I totally understand - Sheets isn't the easiest tool, not is it the "prettiest". Using Google's Applied Digital Skills - Sheets, Part 1, we do a few days of the basics with Sheets - vocab; inserting & resizing rows & columns; sorting; formatting; and a little bit of data validation. I tell my students up front, that this part isn't flashy, but it's necessary before we see Sheets in a different way.
Once we cover the basics, I give them the Google Sheets Choice Activity. The first tab contains the directions and the descriptions of the 6 activities. I crafted 6 different activities that should appeal to a variety of interests. I assigned point values to each activity and then I challenged the students to complete enough activities to accumulate 25 points. This is meant to require them to do more than one, but also to keep this activity within a 2 class period timeframe. So far, they have loved it! We didn't cover every single thing they might need to do - so there are times where I get to do a little more with various students.
I've added this activity to my partner blog - Templates for Teachers - to keep all my templates in one spot. If this activity appeals to you, I encourage you to make your own copy and share it with your students. Even better, if you want to make changes to the template by adding activities, changing the requirements, or removing an activity, go right ahead! Make it your own and make it work for your students!
If you use it, I'd love to hear about it!
*** Every Monday, I share a newsletter with a collection of Tech You Can Do resources. It is delivered right to your inbox. Interested? Sign up here! ***

Overhauled master schedule.
2 new courses for me: one is brand new; co-taught class. The other existed, just now on my plate.
Still teaching the classes from last year.
And study halls.
Total = 12 different groups of students. I got this. I think. 🤣
I'm taking the best of what I did last year and modifying or substituting to make it better. I had my 7th graders last year, so I know what we covered AND I know them. After giving them a day to do some digital organization, something I feel is important to make time for, we moved right into a project. Smart move.
These kids have skills and they aren't afraid of tech. They need very little direct instruction as far as tools go, but I feel they could use practice making choices, explaining their choice, and interpreting what needs to be done. Rather than give them a specific "recipe", I wanted to leave the door open a bit for them. We are now done with project and I'm very happy with how it went! Here's a recap ... you can absolutely replicate this!
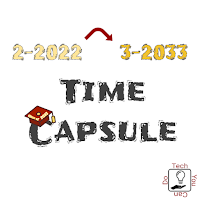
I chose two of John Spencer's video writing prompts. I kept in mind the students I had and tried to choose two I thought had wide appeal. I also chose one that needed more creativity when responding, "You Woke Up Inside of a Video Game," and one that was more straight-forward, "What would you put in a time capsule?"
Day 1:
*** Want to hear more from me? Every Monday, I share a newsletter with a collection of Tech You Can Do resources. It is delivered right to your inbox. Interested? Sign up here! ***
I recently wrapped up a grading period with my students and I wanted to do something "different". They were all fairly proficient with technology and they had a wide variety of interests. I decided I couldn't find or create anything that would satisfy and challenge them all, so I went in the opposite direction.

If your students are anything like mine, they BEG for control and choice. But, I've noticed they often don't know what to do with it when they have choice. So I decided to provide a framework for the project, but allow the students to fill in all of it.
You should have seen their faces. We had 5 days left in the quarter and I wanted them to spend time brainstorming and "researching" and asking questions, which would really leave about 4 days to actually DO their project.
I shared the "Self-guided Project" template with them in our LMS. We walked through it together. I asked them to list 3-5 topics they are interested in - whether because they already know a lot or because they WANT to learn. Then to think about the tools we've used in class, as well as ones they are already comfortable with (I suggested this might not be the project to "learn" a new tool). Then we talked about the audience. This one was tougher for them. I agreed teachers quite often are their audience, but that wasn't my goal with this project. We talked through why a project made for a kindergartener would probably look different than one done for an adult, a parent perhaps. And then we brainstormed together who some different audiences might be.
Finally, we talked about putting it all together. Since this was their first time with a project as open as this, I provided a list of potential projects they might want to consider, but strongly recommended they think creatively and that they could come up with something of their own design. Ultimately, their projects could be summed up in a sentence using this structure:
"I want to create a ___(fill in project) ___ about ___ (fill in topic) ___ for ___ (fill in audience) ___ using ___ (fill in tool)___."
They were off! It was awesome to see them design their project and move forward with them. Questions came up - help was needed - some projects finished quickly & new projects were designed with the same framework - some projects didn't get finished - but they all enjoyed it. Including me.
The best part about this framework, it's not grade specific. It's not dependent on certain tools. If your students cannot handle ALL of the choices, you can fill in one or more of the components to guide them and as they gain confidence, you can reuse this with them and they will create something completely different.
I will definitely be using this again!
NOTE - as with most everything I do/create, the 1st rendition is rarely "amazing", so the version I'm sharing with you is somewhat different from what I used with my students. When I do it again, I wanted to be sure I was explicit with the four aspects - topic, tool, project, & audience - and I wanted to also have students create a Doc they could use more than once and not have to start over.
If you'd like to make your own copy, please check out the "Self-guided Project Template" housed on my companion blog, Templates for Teachers. Feel free to look around at the other templates shared. You can make copies of any/all of them and then modify to best suit you.
If you use this with your students, will you let me know how it goes? I'd love to know.
Enjoy!
*** Every Monday, I share a newsletter with a collection of Tech You Can Do resources. It is delivered right to your inbox. Interested? Sign up here! ***

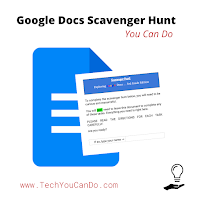
Just about a year ago, I published "Docs Scavenger Hunt You Can Do" sharing how I modified from Catlin Tucker. Today I'm sharing how I modified this - again - for my current 6th graders. We moved well beyond basic formatting into some pretty awesome tools and capabilities. Depending on how much background your students have had with Google Docs, you may need to modify this or take portions out.
You can get your own copy of the scavenger hunt for middle schoolers on my partner blog, Templates for Teachers. (Feel free to look around at the other templates housed there, too!)
*** Every Monday, I share a newsletter with a collection of Tech You Can Do resources. It is delivered right to your inbox. Interested? Sign up here! ***
.png)
The couple of weeks leading up to this tech lesson, we had dug into Google Slides, so I started this lesson off with "hands off" and just looking at your screen, compare Slides to Docs. [I HIGHLY recommend doing a visual comparison before jumping in ... you can quickly gauge how much each group knows/doesn't know so you can more easily pace your activities.] It's always amazing to me what stands out and what doesn't stand out. Some students notice very small things (one commented on not having the paint bucket in Docs) and others find much bigger things (the color of the "Share" button).
Moving into the actual scavenger hunt, I let the students know that I did not originally create it, but I DID modify it to better fit them. [Thank you, Catlin Tucker!] I've used this before with students and it works really well! This year, I broke up the questions a bit more to fit the amount of time I get to spend with them - my goal is one page per visit.
I'm going to share the link to "Google Docs Scavenger Hunt for 3rd grade" here, but the link is going to take you to my co-written blog, Templates for Teachers. Keeping all of the student activities together makes a lot of sense. Now, I call it "for 3rd grade" because that is the group of students I use it with, but you are more than welcome to change it or take it off completely. Please also feel free to modify to add/subtract the "hunt".
*** Every Monday, I share a newsletter with a collection of Tech You Can Do resources. It is delivered right to your inbox. Interested? Sign up here! ***
I was inspired last Monday to create an activity for a group of kindergarteners for Groundhog's Day. I had just watched a video about a new extension called Mote. (Website - https://www.justmote.me/) I thought it would be perfect to use, if it worked the way that had been explained. It absolutely did what it said - easily inserted audio onto Google Slides.
One of the things I realized very quickly is including audio is a VERY important step, especially if we want to encourage independence. Adding audio in short snippets and locating it in strategic spots is also important. Something else I realized is these kiddos like choice. I try to use a variety of activities that use different skills. I also wanted to make sure there was several activities so the kiddos who can do more have more to do. Keeping each slide simple is also important.
Finally, more than ever, I see how valuable the master slide is for this age group. Being able to put text or visuals on a slide with little ability for students to accidentally delete is critical. I have been intimidated by the master slide for awhile, but I'm embracing it now and loving the benefits!
And ... if you've not yet checked out Mote, don't waste another minute! I cannot tell you how easy it is to use!!! (And it saves directly to your Google Drive - but not in a specific folder, so make sure to organize the recordings right away.)
The slides below are created for kindergartners, but you are welcome to make your own copy and modify it to better fit your students! The links are below.
This week I am taking a pause from Google Classroom because November is quite possibly one of my favorite months! I'll be 100% honest - it IS my birthday month, BUT honest and truly, I love the leaves changing ... I love the fall smell in the air ... I love how some days are warm, but some have a chill ... and most of all, I love Thanksgiving. My mom does an AMAZING Thanksgiving dinner. The entire nine yards. Yum!!!
This year has been a tough year. Yes, all around T O U G H. But here we are. It's mid-November. I can smell the turkey. I can taste my mom's dinner rolls and the pumpkin pie. (I load mine with Cool whip!) Yum yum yum.
While it's been a tough year, I still know I have a lot to be grateful for. I write 6 items I am grateful for each day in my journal. My family is always number one. Our health is number two. Sometimes it's the weather, sometimes it's a co-worker who has been incredibly helpful; it has been that my husband didn't lose his job, my daughter didn't need stitches, we all got to go back to school, and so on.
The activity I'm sharing today is "Gratitude A-Z You Can Do" and has all the slides A-Z in the add a slide area, so it won't overwhelm any student. Instruct students to complete 1 slide each day, or multiple. It's a total of 26 slides. Not sure you can devote that much time to it? Have students spell out their name or "thankful" or another Thanksgiving-related word.
Interested in making your own copy? Click on this link for "Gratitude A-Z You Can Do." Now you can use your own copy to create an Assignment in Google Classroom (or your chosen LMS). I highly recommend using the "Make a copy" for each student.
In case you are looking for more, or even something additional, last year I shared the activity I created for 4th graders in my district. I called it "Thankful Thoughts You Can Do". (Feel free to click the link and explore that activity.) I've also been collecting Thanksgiving-related activities in, you guessed it, a Thanksgiving collection. I hope you and your students enjoy!
Do you know of other good activities? I'd love to add them. You can leave them in the comments below ⤵ or connect with me on the socials - linked above right.
Last week I shared one of the presentations I did at TCCA. This week, I'm sharing the other one. Google Sheets in the Classroom is focused on using Google Sheets with students in your classroom. Sheets - at first glance - is a spreadsheet tool. And you're not wrong ... but as with so many of the Google tools, don't just use it for its initial use. Look beyond.
Google Sheets has the ability to break any activity or task into multiple parts ... use the tabs at the bottom in a similar manner to new slides in Google Slides or a new page in Google Docs. You can insert images two different ways; merge cells to make larger spots; change the font, the font size and color; fill cells with color; and so much more! I also built my entire presentation IN Sheets so that you can see quickly how versatile Sheets truly can be.
In my presentation, I share 5 activities I've created for use in classrooms. I also share one of my favorite tools - Flippity.net - where Steve shares numerous pre-made activities you can also do. ALL use Sheets as its creation tool. My favorites are the Flashcards, Spelling Words, Matching Game, and Timeline. Sooooo many more - I encourage you to check them and use them. But don't stop there ... encourage your STUDENTS to also use them and build their own.
The most common comment I hear when I bring up using Sheets with teacher and students is that Sheets is very intimidating and teachers are uncomfortable using it. I want to change that. I'm hoping that by sharing this presentation and activities, teachers will see Sheets as a valuable tool.
![]() |
| Val the Valentine |