Let me be clear - the staff have been great and the kids are great. But it has been change - and a big one for me. Reflecting on this time, I really do appreciate the way this transition worked out.
I spent this semester teaching coding classes. Some of the students were really into coding and some not so much. Some were confident with coding and a few could already run circles around me, but some were relatively new to coding. I saw very quickly this was not going to be a "one size fits all" class.
We started out with an inventory regarding their skill, interest, and what they wanted to do/learn about coding. Then we covered some "must have's" and "cannot's" in a program. From here, they evaluated Common Sense Media's list of "Best Coding Programs for Middle School' based on our requirements. We ended up with a handful of resources.
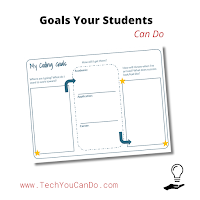
Enter Catlin Tuckers Goal sheet. I came across this right about the same time as we finished up our evaluations and I had a lightbulb moment. What if each student decided what THEY wanted to accomplish in coding, and from there, selected the resource that would best support them? Bingo!
To better facilitate this for them, I created a modified version of Catlin's goal sheet as well as a guide for the students. I called it "Coding Goal & Pathway". I broke the middle column down. The "How will I get there?" included a spot for an academic path, an application path, and a career path. Each student received the goal sheet on paper. They referred to the rest on their computer.
The "academic path" was to ensure a resource for them to do specific learning about coding.
The "application path" was the program they were choosing to create their project in/on.
And the "career path" was meant to expose them to future potential paths.
Students were given the paper part and time to work through the goal setting process. Quite a few had great ideas for what they wanted to create or work on. And after having worked through the evaluation of the potential programs, most easily settled on the academic path that worked for them. We ended up having several "career exploration days" where we did this portion of their goals. As class progressed, I did check ins and provided support and feedback. They also took turns sharing their projects.
I believe it went well! I had several students complete their goal and move on to a second one. I also have a few that are continuing to work on their projects. I'm excited to see they want to continue to build and improve what they started.
Next semester I'm excited to have 6th graders. The focus of this class will be technology skills. I've got lots of goodies planned for them!
*** Every Monday, I share a newsletter with a collection of Tech You Can Do resources. It is delivered right to your inbox. Interested? Sign up here! ***


.png)
.png)
.png)
.png)
.png)
.png)
.png)
.png)
.png)