Showing posts with label Creativity. Show all posts

Saturday, November 1, 2025

Student Thinking You Can Do

I'm going to expand on a blog I wrote a year ago when I was back in the classroom as a Technology Teacher.  I shared "Project Breakdown You Can Do" about how I used John Spencer's video writing prompts in my 7th grade technology class. I really loved this project. It had student choice, creativity, a wide range of depth opportunities, and a lot of student driven aspects. I encourage you to read it along with this one.

I'm going to focus more on the student thinking aspect of this project. I was lucky enough to go to a workshop about Gemini this week and had a great conversation with a PLN friend from another part of Ohio. We got to talking about using AI in the classroom and he referred to teachers concern about students still DOING the thinking and how we tackle that. I shared an overview of the activity I did with John Spencer's writing prompts and how I feel activities like this can help teacher avoid AI generated content. 

Sure, my students 100% could have fed the video into an AI tool and it would have spit something back out. BUT ... here's the key to where I believe students wouldn't reach for AI ... 

#1 - they had 100% choice in which prompt to respond to 

#2 - they had 100% choice over the tool/design they used for their final project

#3 - I required them to converse with peers about the expectations of the prompt

#4 - I required them to converse with peers about how they'd be graded, down to how many points each rubric element was worth

#5 - peer feedback was built in to the project timeline

#6 - they graded themselves with an explanation before I did and reflection was required

The student choice on their topic wasn't super new to them, but they struggled when they were allowed to choose their tool. We had an entire conversation around what tools are available and what might work or not work for each prompt. Talking through that helped quite a few of them ... some still needed more guidance, but it helped. 

I saw struggle - and perseverance - kick in with the conversations around the expectations. It was shocking to ME how tough it was for them to really understand what the prompt was asking them to do. I realized how little practice they have ever had with this. They are so used to being told exactly what to do and how to do it. 

THE toughest part of this activity was when it came down to them talking about the grading rubric. I told them this project was worth 50 points. THEY needed to decide where they felt these points should be assigned --> what was the criteria and how many points. Wow! The complete randomness they assigned points really opened my eyes. Either they think teachers have some magical training in rubric math or they have zero clue 😁 . 

I know a lot of teachers have students reflect on their work, but doing it in addition to them grading themselves was enlightening. They didn't just choose points, they had to explain their point value. Quite a few of them were harder on themselves than I would have been. 

When I think about this, it feels like a very overwhelming project, but honest and truly it wasn't. I posted links in our LMS for the prompts, had the conversations planned, provided the generic "what is required for your prompt" half-sheet, and the rubric worksheet ready, but otherwise, it was work and think time in class. If they chose to - or felt they needed to - they could work on it outside of class. 

Lots of student thinking - lots of AI proofing - but this was a project the kids very much enjoyed! I had to "close the chapter" on this project for a lot of them because they wanted to continue working on them ... while it made me very happy, sometimes we have to recognize we can fiddle and adjust and never feel "done". 

If you are interested in the student components I've talked about, I've added them to my Templates for Teachers blog where I share all the items others can make their own copies and use "as is" or make modifications and customize. You can find it here: John Spencer Writing Prompts activity


*** Every Monday, I share a newsletter with a collection of Tech You Can Do resources. It is delivered right to your inbox. Interested? 
Sign up here!  ***

Sunday, February 23, 2025

"Lifelines" You Can Do

I've noticed the many of the students I have right now are hesitant to work independently. I don't mind questions, but it's not so much about not understanding as it seems to be they want hand-holding. I wracked my brain to try something to encourage independence and inspiration hit! 

Big time!


Do you remember the game show, "Who Wants to be a Millionaire?" Do remember the lifelines each contestant was given? Bingo. 

I decided to give my students 4 lifelines the first time I gave them a digital breakout to work on. Most students said they were familiar with digital breakouts, but when we got to work on it, most of them froze on what to do. I'm so glad I decided to use the lifelines!


The four "lifelines" I gave them were:

  • ask a classmate
  • help from Mrs Kiefer
  • Google It
  • Google It
I explained to them a digital breakout would take some work. They'd be challenged and may not find the answers right away. But they could use a lifeline to help them if they were really stumped. Ultimately, if they didn't use a lifeline, I'd reward them with a bonus point on their total score. They could earn a total of 4 bonus points. This really motivated them! (I also told them if they didn't write their name on their lifelines they'd lose any chance of the bonus points ... I'm also working to instill responsibility! I'm shocked at how many of them did NOT write their name on theirs!)

I'm not quite sure who had more fun with these lifelines; the kids or me? They would ask me a question and before I'd answer, I'd say to them, "Are you sure you want to use this lifeline?" The vast majority of the time, they hesitated and waved me off. It really encouraged them to think strategically about using each one.  And they were super honest about when they DID use one, even if I wasn't right there to mark it off - they'd do it themselves.

The second time I used them this quarter, I collected them from the students as they left the room. The social studies teacher across the hall from me noticed them and asked about them. I shared the story and he asked if he could borrow the idea - he had noticed the struggle, too, since we share the same kids. I laughed and said, "Of course! But you have to find your own bitmoji!"

I made mine in Canva and I would suggest you look at the assignment you want to use it with and think about what would be an appropriate number and type of lifelines and go from there. I also shrunk them down so they are about the size of a bookmark - 4 to a single sheet of paper - rather than an entire sheet. I ran off a bunch, so I always have a stack ready to go at any time. 

This is such a fun addition to ANY activity. It can be added to ANY lesson - ANY grade - ANY content.


*** Every Monday, I share a newsletter with a collection of Tech You Can Do resources. It is delivered right to your inbox. Interested? 
Sign up here!  ***

Saturday, August 31, 2024

Project Breakdown You Can Do

Year 2. 

Overhauled master schedule. 

2 new courses for me: one is brand new; co-taught class. The other existed, just now on my plate. 

Still teaching the classes from last year. 

And study halls. 

Total = 12 different groups of students. I got this. I think. 🤣

I'm taking the best of what I did last year and modifying or substituting to make it better. I had my 7th graders last year, so I know what we covered AND I know them. After giving them a day to do some digital organization, something I feel is important to make time for, we moved right into a project. Smart move.

These kids have skills and they aren't afraid of tech. They need very little direct instruction as far as tools go, but I feel they could use practice making choices, explaining their choice, and interpreting what needs to be done. Rather than give them a specific "recipe", I wanted to leave the door open a bit for them. We are now done with project and I'm very happy with how it went! Here's a recap ... you can absolutely replicate this!

I chose two of John Spencer's video writing prompts. I kept in mind the students I had and tried to choose two I thought had wide appeal. I also chose one that needed more creativity when responding, "You Woke Up Inside of a Video Game," and one that was more straight-forward, "What would you put in a time capsule?"

Day 1:

  • Short explanation of project ... choose the writing prompt AND choose the tool to create your response. I did not restrict them on tools. They could choose the one they felt was best.
  • Watched the prompts together - YouTube gets overwhelmed if they all try at them same time. Allowed for questions.
  • In Schoology, I created a folder with completion rules to help sequence student work:
    • #1 - I had a 2 questions assessment: Which prompt are you choosing & why? 
    • #2 - a discussion question: which tool are you going to use
  • Students may start to work on their project
Day 2:
  • With the hope that conversing and discussing the prompt in terms of what to DO would help the students drive their own ideas, I wanted them to talk about how they were interpreting the prompt.
  • Before getting to work, I had students make groups of 4 with others who are doing the same prompt. Both prompts received the same questions. The paper they filled out asked several questions:
    • What are you responsible for "answering" with your response?
    • What are the REQUIRED pieces to your response?
    • Is there anything you should NOT do as or in your response?
    • How might you go BEYOND the requirements?
  • After several minutes, I collected their papers and had them make a different group of 4 and repeat this exercise.
  • Rest of class was time to work on their projects.
Day 3:
  • Started class with the complied answers to the questions from yesterday. I have to say, they were more or less all on the same track with the answers. 
  • I also allowed for questions. 
    • My favorite was, "Mrs. Kiefer, can you leave this up? I think it's really good for me to look at as I keep working." [You betcha!!!]
  • Work time
Day 4:
  • Began class with a "Glow & Grow" peer feedback. I took their compiled answers and created a short feedback sheet. Only 3 outcomes to focus on:
    • Content - Is student answering prompt appropriately?
    • Soft Skills - does their tool fit the project well?
    • Media Skills - project is answering the prompt creatively?
  • One on side of each criteria, the peer is expected to write a positive. On the other side, a suggestion or idea for improvement.
  • We covered boundaries for this and how to "take in" the feedback. It's all meant to be helpful, but changes should only be made if the creator agrees and feels it would be an improvement.
  • Today, they were pairing up with another student that did the SAME prompt. Turn in paper.
  • Ultimately, they will need to have 3 total peer feedbacks before turning their project in.
  • I tracked this as an assignment in Schoology.
  • Rest of the class was work time.
*** The feedback portion took a bit longer than I'd thought it would ... NOT a bad thing at all! ***

Day 5:
  • In Schoology, I asked students to share the link to their project. This was a big topic we covered last year - ensuring the correct sharing privileges - so I wanted to be sure they all did this early on, so I didn't have to keep asking for it at the end when I went to grade it.
  • Full work day.
  • Recommended to do at least one more peer feedback. Only rule is it cannot be the same person. 
Day 6:
  • "Temperature check" ... are we feeling good and getting close? Up to this point, I'd not mentioned a due date. Students said they were getting close. We decided to aim for tomorrow at the end of class. If they felt they needed more time, I asked them to talk to me.
  • I went over how many pieces of feedback were still needed.
  • Work day.
Day 7:
  • Final work day.
  • Turn in when finished in Schoology. Basically they copied and pasted the link again in an assignment with the rubric for me to grade it.

Whew! I have to say, I'm SUPER pleased with how this project went. My students really did seem to dig into it - didn't matter which prompt they chose.  The time capsule one did appear to go a bit quicker, but I pushed those students to really dig in and try to be creative. Off-task behaviors were limited during this project and I was thrilled.

I would really love to bring all of these projects together in one spot. I was thinking a website created by the students? However, I do feel like we need to move on. I don't want to let them get bored. Possibly at the end of the quarter, it can be a self-chosen project that a few of them decide to take on? Who knows? 

What do you think? Areas to improve? Anything to add? I know I probably won't call them "Glow & Grows" again ... they didn't scoff at it, but it felt a bit juvenile. I ended up just referring to them as their "peer feedback". 

** Update I added the Docs I created for this project into ONE cohesive Doc. It includes the questions students had to answer as a group who had chosen the same prompt in the hopes of ensuring they were interpreting the "ask" properly AND the activity I had them work through to create the rubric for their prompt. I did also include the rubric we designed for each of the 3 writing prompts as examples. Please do not feel tied to them - my students helped design them - yours might interpret things differently. The "work" in this is that THEY are identifying the requirements. 

You can find the Docs on my sister blog - Templates for Teachers. John Spencer Writing Prompts activity  

Next up ... credible sources. What are they? Where/how do we find them? How do you know it's credible? Can we crowdsource? I'll share about this, too. I'm super excited about this. We expect our students to do a LOT of research and while I was collaborating with an educator in another district about a class we both teach, I have a very exciting addition to add to this project!


*** Want to hear more from me? Every Monday, I share a newsletter with a collection of Tech You Can Do resources. It is delivered right to your inbox. Interested? 
Sign up here!  ***

Thursday, March 14, 2024

Self-guided Student Projects You Can Do

I recently wrapped up a grading period with my students and I wanted to do something "different". They were all fairly proficient with technology and they had a wide variety of interests. I decided I couldn't find or create anything that would satisfy and challenge them all, so I went in the opposite direction. 

I didn't design a project. I gave them ALL of the power.

If your students are anything like mine, they BEG for control and choice. But, I've noticed they often don't know what to do with it when they have choice. So I decided to provide a framework for the project, but allow the students to fill in all of it.

You should have seen their faces. We had 5 days left in the quarter and I wanted them to spend time brainstorming and "researching" and asking questions, which would really leave about 4 days to actually DO their project.

I shared the "Self-guided Project" template with them in our LMS. We walked through it together. I asked them to list 3-5 topics they are interested in - whether because they already know a lot or because they WANT to learn. Then to think about the tools we've used in class, as well as ones they are already comfortable with (I suggested this might not be the project to "learn" a new tool). Then we talked about the audience. This one was tougher for them. I agreed teachers quite often are their audience, but that wasn't my goal with this project. We talked through why a project made for a kindergartener would probably look different than one done for an adult, a parent perhaps. And then we brainstormed together who some different audiences might be.

Finally, we talked about putting it all together. Since this was their first time with a project as open as this, I provided a list of potential projects they might want to consider, but strongly recommended they think creatively and that they could come up with something of their own design. Ultimately, their projects could be summed up in a sentence using this structure:

"I want to create a ___(fill in project) ___ about ___ (fill in topic) ___ for ___ (fill in audience) ___ using ___ (fill in tool)___."

They were off! It was awesome to see them design their project and move forward with them. Questions came up - help was needed - some projects finished quickly & new projects were designed with the same framework - some projects didn't get finished - but they all enjoyed it. Including me. 

The best part about this framework, it's not grade specific. It's not dependent on certain tools. If your students cannot handle ALL of the choices, you can fill in one or more of the components to guide them and as they gain confidence, you can reuse this with them and they will create something completely different.

I will definitely be using this again!

NOTE - as with most everything I do/create, the 1st rendition is rarely "amazing", so the version I'm sharing with you is somewhat different from what I used with my students. When I do it again, I wanted to be sure I was explicit with the four aspects - topic, tool, project, & audience - and I wanted to also have students create a Doc they could use more than once and not have to start over. 

If you'd like to make your own copy, please check out the "Self-guided Project Template" housed on my companion blog, Templates for Teachers. Feel free to look around at the other templates shared. You can make copies of any/all of them and then modify to best suit you.

If you use this with your students, will you let me know how it goes? I'd love to know.

Enjoy!


*** Every Monday, I share a newsletter with a collection of Tech You Can Do resources. It is delivered right to your inbox. Interested? 
Sign up here!  ***

Saturday, December 16, 2023

Goals Your students Can Do

I am writing this as I finish up my first semester back in the classroom after 7 years as a tech coach. Whew! It has been an adjustment! First, it was in a new district. Second, it was an unconventional semester due to a pending change in the master schedule. And third, only recently have I felt myself getting into the groove and settling in (is that a sign of age???). 

Let me be clear - the staff have been great and the kids are great. But it has been change - and a big one for me. Reflecting on this time, I really do appreciate the way this transition worked out.

I spent this semester teaching coding classes. Some of the students were really into coding and some not so much. Some were confident with coding and a few could already run circles around me, but some were relatively new to coding. I saw very quickly this was not going to be a "one size fits all" class.

We started out with an inventory regarding their skill, interest, and what they wanted to do/learn about coding. Then we covered some "must have's" and "cannot's" in a program. From here, they evaluated Common Sense Media's list of "Best Coding Programs for Middle School' based on our requirements. We ended up with a handful of resources.

Enter Catlin Tuckers Goal sheet. I came across this right about the same time as we finished up our evaluations and I had a lightbulb moment. What if each student decided what THEY wanted to accomplish in coding, and from there, selected the resource that would best support them? Bingo!

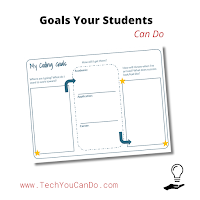
To better facilitate this for them, I created a modified version of Catlin's goal sheet as well as a guide for the students. I called it "Coding Goal & Pathway". I broke the middle column down. The "How will I get there?" included a spot for an academic path, an application path, and a career path. Each student received the goal sheet on paper. They referred to the rest on their computer.

The "academic path" was to ensure a resource for them to do specific learning about coding.
The "application path" was the program they were choosing to create their project in/on.
And the "career path" was meant to expose them to future potential paths. 

Students were given the paper part and time to work through the goal setting process. Quite a few had great ideas for what they wanted to create or work on. And after having worked through the evaluation of the potential programs, most easily settled on the academic path that worked for them. We ended up having several "career exploration days" where we did this portion of their goals. As class progressed, I did check ins and provided support and feedback. They also took turns sharing their projects.

I believe it went well! I had several students complete their goal and move on to a second one. I also have a few that are continuing to work on their projects. I'm excited to see they want to continue to build and improve what they started.

Next semester I'm excited to have 6th graders. The focus of this class will be technology skills. I've got lots of goodies planned for them!

*** Every Monday, I share a newsletter with a collection of Tech You Can Do resources. It is delivered right to your inbox. Interested? Sign up here!  ***

Sunday, April 10, 2022

Certificates You Can Do ... EASY!

I'm excited to have something I TRULY believe will help YOUR teaching life become so much easier! 

Canva.

As crazy as it might be, I have some teachers thinking forward to wrapping up the year (wow!) and the topic of certificates has come up. For today's teachers, there are unlimited possibilities for certificates. And I'm going to add to your tool belt today. In fact, this might replace everything you are doing because of its simplicity, its ease of use, and its possibilities.

Canva is "a graphic design platform, used to create social media graphics, presentations, posters, documents and other visual content." I've recently jumped in and have been using to to create the images that go along with my blogs. 

And then I noticed the "Templates" tab. That leads me to today. Their Templates tab is organized into 6 categories, one being education. CERTIFICATES. Sure, I expected to some good ones. But I was blown away!!!!

As a teacher, you can even get Canva Pro FREE! Yep! You and your students. It's simple - go to canva.com/education and sign up.

Now, for the templates, I could just point you to their website and where to find the link, but I'm going to give you an overview of just how EASY Canva is to use for your certificates and how you can create just one OR create a TON! Just click play!


Did I hook you in? Ready to start your own account? Are you interested in learning more? 
Check out the resources I've got ready for you:


And if this has been helpful, sign up for my Monday morning "Tech You Can Do" newsletter. Delivered directly to your inbox each week, I share tech tips, activities, resources, & more!

Subscribe to my Tech You Can Do weekly newsletter

Saturday, February 5, 2022

2033 Time Capsule You Can Do

We are in a very unique month ... February 2022 ... or 2-2022. And if you look at specific dates, you'll see two more more unique dates: 2-2-2022 and 2-22-2022. Have seen the posts on social media suggesting  students to create time capsules like I have? What makes 2/2022 even more unique is the current first graders will be in their SENIOR YEAR in 2033! Layer on specific dates and these 1st graders will experience March 3, 2033 ... or 3-3-2033 ... in their senior year.

How cool are these dates?

I shared this idea of time capsules with the 1st grade teachers in my district and they all loved it as much as I did. I'm excited to see what becomes of this activity! Today, I am sharing the digital activity I created to go in the time capsules.

This activity is loosely based on the idea of capturing "now" in a way that can easily be compared to future dates. I bought something like this for my own daughters capturing their birth year information. You are welcome to use it "as is" or it can be completely customized to better fit you and your students. I created one slide to fit current 1st graders and one slide that will work for students of all ages.

Interested? Click the image below to make a copy for you & your students. What else will you include in YOUR time capsules?


Sunday, February 7, 2021

Tech-infused Valentine's activities You Can Do

I was inspired last Monday to create an activity for a group of kindergarteners for Groundhog's Day. I had just watched a video about a new extension called Mote. (Website - https://www.justmote.me/) I thought it would be perfect to use, if it worked the way that had been explained. It absolutely did what it said - easily inserted audio onto Google Slides.


 I shared the activity via Google Classroom and I got to see first-hand these kiddos doing the activities I had designed. For the most part I was thrilled! But I also saw some things I had not anticipated. I knew I could do better and I wanted to do better! So this week, I sat down and took all of that in and created what I am sharing below.

One of the things I realized very quickly is including audio is a VERY important step, especially if we want to encourage independence. Adding audio in short snippets and locating it in strategic spots is also important. Something else I realized is these kiddos like choice. I try to use a variety of activities that use different skills. I also wanted to make sure there was several activities so the kiddos who can do more have more to do. Keeping each slide simple is also important.

Finally, more than ever, I see how valuable the master slide is for this age group. Being able to put text or visuals on a slide with little ability for students to accidentally delete is critical. I have been intimidated by the master slide for awhile, but I'm embracing it now and loving the benefits!

And ... if you've not yet checked out Mote, don't waste another minute! I cannot tell you how easy it is to use!!! (And it saves directly to your Google Drive - but not in a specific folder, so make sure to organize the recordings right away.)

The slides below are created for kindergartners, but you are welcome to make your own copy and modify it to better fit your students! The links are below.


If you want your own copy, here is a link for a template view: Valentine's Day

Looking for more - or different activities - for Valentine's Day? I've got an entire Valentine's Wakelet collection for them! 

I hope you (& your students) enjoy this or any of the other activities! If you have any questions, please feel free to comment below!

You can also find me on:
Twitter - @kiefersj
Facebook - Sarah Kiefer

Sunday, November 1, 2020

Google Sheets in the Classroom You Can Do

Last week I shared one of the presentations I did at TCCA. This week, I'm sharing the other one. Google Sheets in the Classroom is focused on using Google Sheets with students in your classroom. Sheets - at first glance - is a spreadsheet tool. And you're not wrong ... but as with so many of the Google tools, don't just use it for its initial use. Look beyond.

Google Sheets has the ability to break any activity or task into multiple parts ... use the tabs at the bottom in a similar manner to new slides in Google Slides or a new page in Google Docs. You can insert images two different ways; merge cells to make larger spots; change the font, the font size and color; fill cells with color; and so much more! I also built my entire presentation IN Sheets so that you can see quickly how versatile Sheets truly can be.

In my presentation, I share 5 activities I've created for use in classrooms. I also share one of my favorite tools - Flippity.net - where Steve shares numerous pre-made activities you can also do. ALL use Sheets as its creation tool. My favorites are the Flashcards, Spelling Words, Matching Game, and Timeline. Sooooo many more - I encourage you to check them and use them. But don't stop there ... encourage your STUDENTS to also use them and build their own.

The most common comment I hear when I bring up using Sheets with teacher and students is that Sheets is very intimidating and teachers are uncomfortable using it. I want to change that. I'm hoping that by sharing this presentation and activities, teachers will see Sheets as a valuable tool.


And here is my presentation, Google Sheets for the Classroom

I hope you try out at least one of the activities with your students. I do believe that Sheets is a wonderful addition to every class.

One more thing ... if you are interested in learning more & going more in depth with Google Sheets, I did a 2 hour webinar this past summer called "Intro to Google Sheets". I'd love it if you check this one out, too!

Do you have any questions? Need or want some help? I'd love to help. Please feel free to comment below ... Tweet at me @kiefersj ... find me on Facebook ... or even email me sarah@techyoucando.com.

And don't forget ... I have a Google Sheets Wakelet collection where I'm always adding to it with awesome Sheets tips, tricks, and resources.


Sunday, July 5, 2020

Google Slides & Forms You Can Do

My journey continues this week with Google Slides & Google Forms.

Google Slides is a presentation tool & Google Forms is a survey tool. But as with Sheets & Docs, don't limit them to their "face value" ... if you do, you will miss out on SOOOO much! 

Slides is probably my "go to" Google app for, well, pretty much ANYthing & EVERYthing I do. Slides allows for SUCH a wide variety of uses - presentations, for sure; but also, interactive activities, eBooks, photo albums, entire lesson plans, writing activities, research, and so much more! Be sure to check out the resources I share. If you are a teacher, you really need to check out and use Slides ... it won't disappoint!

Forms was honestly where I really fell in love with Google. It didn't look like much, but I never looked back once I created my 1st Form - and all I did was use it as a glorified scantron! Forms may not look like much but IT. IS. POWERFUL! Surveys, assessments, interactive activities, choose your own adventures, data collection, curation tool, and so much more! I literally had to walk away from my computer & give myself a pep talk, "You 'could' continue giving examples of ways to use Forms, but you have 10 already!"

And the best part ........... we aren't done. That's right! We are only half-way through this summer webinar series & you can still join in! 

I've got several things coming up this week:
  • Monday, July 6 (1-3 pm EST): Google Drive You Can Do
  • Tuesday, July 7 (9 pm): I will be participating in a Twitter chat about the book "Innovate Inside the Box" by George Couros & Katie Novak.
  • Thursday, July 9 (1 pm EST): I will also be presenting for GEG Louisiana, "Working Together to Support Our Students"
  • Friday, July 10 (6 pm): EdChange Global Conference: I'll present "Build an App for Your Classroom"
  • Saturday, July 11 (8 am): EdChange Global Conference: I'll present "Start Google Classroom on the Right Foot"
And during the rest of July ... Classroom, Chrome, and as many other Google Apps as I can cram into the 2 hours! I have links to the registration for all of these on "My Presentations" calendar page linked above. Everything is FREE & I'd love to see you at any or all of them!

Now, on to my shares for this week ... below you will find the YouTube videos & the resources I use in each presentation.


Google Slides

Video →


Google Forms

Video →


I hope you enjoy these! Please reach out if you have questions or if you'd like some additional help. I've been loving connecting with some of the viewers on Twitter and through email. Together, we are better.

You can comment below ... or Tweet at me @kiefersj ... or even email me at sarah@techyoucando.com .

Also, be sure to check out Desiree's many other helpful videos & tips on he YouTube Channel → Educator Alexander


Sunday, May 17, 2020

Templates You Can Do ... like Alyssa!

I am thrilled to share this today! It's a bright spot in all of the strange and difficult times we've been through the past couple of months. To start, you might know I have a co-created website - Templates for Teachers - with Beth Kingsley. We shared it nearly two years ago and have worked to add to it. About a month ago, we shifted it over to a new site and have enjoyed it even more! I can't believe it's been a month since we shared out the new site. We've published a handful more templates as we continue to move them over & we'd love for you to check them out.

Beth's and my goal with Templates for Teachers is that we create for our classes and we share the templates on our site for anyone to take. You are welcome to use them as they are, or modify them to your own needs. Our previous site only allowed us to actually share the templates. Our new site allows us to also share ideas on how to use them with younger or older students. You can also use the filtering to help you view similar templates or types of templates.

I received an email from a good friend of mine, Alyssa, on April 29. She shared a Google Slide with me and included a note telling me she'd found a template on our site & modified it to fit her class. It's stories like this that are bright spots in the midst of these strange times. 

Here is Alyssa's story - Beth created the "Mother's Day Gazette" for her 3rd graders as a project for Mother's Day last year. (This is an amazing template and they turned out super awesome!) Alyssa was browsing our site and saw it. Alyssa is a 7th & 8th grade Social Studies teacher, mind you. When she saw the gazette, she saw it as a way for her 7th grade students to demonstrate their learning of the Renaissance with a scrapbook. 

Whaaaaaaat??? Do you see a Renaissance scrapbook from the Mother's Day Gazette? I didn't, but Alyssa did! And she is graciously allowing me to share it on our Templates for Teachers website - to quickly find it, click on the label "Alyssa Bruck" on the far right side of the site! You have to check it out - BOTH are amazing! And it's truly a dream come true for me to see a colleague (& friend!) to take one of our templates and modify it to fit her needs in such a creative way!

Alyssa has since followed up the scrapbook with THREE more Renaissance themed templates! (These are also featured on our Templates site) And then this week - just when I was struggling with focus on school work, yet ANOTHER email from Alyssa appeared. I opened it to find a Civil War Choice Board she created & is using with her students during these last weeks of remote learning. Kudos to you, Alyssa! I was blown away! Truly! And to think ... all of this happening during our time of remote learning!?!

This just goes to demonstrate we all have room to grow and we all have our struggles. But when we pull together, we can do more than we thought possible. I count myself lucky to work with both Beth & Alyssa, and I count myself lucky to be able to share it with you. 

Do you have questions or comments? I'd love to hear from you! Please comment below - connect on Twitter (@kiefersj) - or email me directly (sarah@techyoucando.com).

Finally, I have a few exciting things to share:

* I was honored to be a guest on the GEG Ohio April meeting. I shared about the apps I've created with Slides & Glide Apps. You can check out the recording here (April meeting YouTube link) - be sure to fill out the fill out the form to earn PD credit!

* I am going to present a more detailed session about building apps with my #NYC19 Google Innovator Coach, Dr. Desiree Alexander, on her FREE webinar series. This will be Sat, May 30 @ 12 pm EST (11 am CST). You can find more info & the sign up link at edalex.net/appbuild .

* I will also be presenting "6 Steps to Organize Your Google Drive" on June 2 at 1 pm EST (12 pm CST) for the GEG Louisiana. The leader is fellow #NYC19 Google Innovator, Wiley Brazier! You can sign up on the GEG Louisiana website


Sunday, April 26, 2020

Infusion of Tech You Can Do

I planned to share this about 6 weeks ago - my heart was swelling with pride & accomplishment! Life changed suddenly and I put this on pause. Now, I want to share it because it deserves its day in the spotlight. It's sure to make you smile!


The second grade team at one of my buildings asked me to help them last year with their Wax Museum. They wanted to record their students "being" the historical person and then share the video with parents. We set up shop in a small conference room with a simple black background and the title "2nd Grade Wax Museum". I used a video recorder to make a video for each teacher and then handed it over to each teacher to share. When all was said & done, one of the teachers and I started chatting about potential "level ups" for the next year.


Fast-forward to THIS year. Our district is knee-deep in PBL's (project-based learning). This 2nd grade team chose to use the wax museum to be their PBL and they asked me to help. We talked through their requirements and structure and I came prepared with some ideas. We settled on how we wanted it to go ... and can I tell you right now how PROUD I am of the students?!?!?! (The teachers did a phenomenal job getting them ready, too, but the students were the stars!)


The whole theme to my blog is "Tech You Can Do" and each week my goal is to share something that you and your students can do. For this one, I don't have a template for you to duplicate. But what I am going to share below is their process and what the students did. It is just flat out awesome and I know you can duplicate something out of here for your own students.


May I start by pointing out to you that we are talking about 7 & 8 year olds? Yep. Second graders are 7 & 8 years old. To start, they chose a person that interested them. Then they did some guided research with their teachers - and used both online and print resources. Students took their research and turned it into a paragraph about their person, most of them using a first-person voice. This was typed on a single Google Slide. A second Google Slide was used to create a backdrop for their person using images or items that match their person. Throughout this, they also were working on costumes or props for their person.


Prior to our scheduled taping day, I turned a conference room into our "studio" with the help of our media manager, Diana. After various trouble-shooting and some quick thinking between Diana & myself, we welcomed the famous people into the studio. On recording day, each student stood in front of a large screen display - with their background on display; I was in the center, next to a table with my phone, which was our recording device, a pair of headphones with a microphone attached stretching toward the student; and a second large screen behind me, displaying their Slide with their paragraph (our "teleprompter"). We also had tape, a step stood, and various odds & ends that allowed for the "best" recording for each student. A chromebook was attached to each display to allow the teachers to bring up their Google Classroom where the 2 Google Slides were housed.

Now you, might think, whoa. What did you do with all those videos? Easy!!! Each teacher set-up a Flipgrid grid and I actually just recorded IN the app, so each students' video automatically was captured there. At the end of each recording, I adjusted the names to be that of the student & their historical person. IT. WAS. (and still is) AMAZING!!!! 

And it doesn't end there ... an unintended ability with Flipgrid is the teachers were able to share the videos with their class - allowing for commenting - but ALSO, a QR code & link directly to each student was created and easily shared. Oh how I love when a tool works out so nicely!!! It was amazing to see the kids and be part of this project. Working as a team, we recording right around 100 students! (I even re-recorded a few whose videos were taped side-ways.)

I'd like to wrap this up with a couple of main points:
  1. I've used Flipgrid maybe twice before this ... it was a huge risk on my part! Yikes! I was nervous!
  2. This was big change in the way this project worked for the teachers ... and it was AWESOME!
  3. It's never a bad idea to try something new!

We got some really positive feedback from this from the parents. My favorite is one of the teachers shared that the dad of a student is currently deployed, and his mom wrote to say thank you because she could share the video very quickly and easily. The dad could see his child and feel better connected. Tears. Then and now. 


I also want to give a shout out to Ann Kozma! I contacted her prior to the taping to ask some questions. THANK YOU! I appreciate your help!

Have a great week!


Sunday, April 12, 2020

Google Photos e-portfolio You Can Do

One of my favorite books of the past several years is "The Innovator's Mindset" by George Couros. It sat on my bookshelf for a good six months before reading it, but when I did ....... WOW! Very early on in his book, George shares 2 definitions of innovation on page 19 that I carry with me on a daily basis:

The Innovator's Mindset, George Couros, p.19 (2015)

I've included this as a preface to my share today. Like many of the other items I have shared, today's is a product of a conversation with a teacher I work with and is aimed at filling a need she has. Like many schools around the world, we are deep in remote learning right now. And like many schools, we are doing the best we can as we learn this new way of educating our students. Our awesome curriculum director provided clear direction as we move forward into this method of educating our students. She referred to it as the "One-third rule." 
1/3 new learning
1/3 practice
1/3 feedback

From this mindset, a first grade teacher called me and wanted to talk about how to do the feedback part. It's easy when you are AT school ... it's easy when the student is right in FRONT of you ... it's easy when you spend 6-7 hours each weekday with them ... but what about now? We talked about what she was hoping to do, what she needed to do, what she wanted to do, the tools we have, and so on. Long story ... several ideas tossed around ... and finally ... around 10 pm, I asked her to remind me what she absolutely had to have. She said an easy place for parents to share photos, two way communication, and for it to be simple. [It's important to note - our 1st grade students do not access email, nor have they heavily used Google Classroom, parents had been sharing photos of work already, AND we need to keep this SIMPLE.] 

That is when it hit me. I called on the "iteration" definition from George - why not use Google Photos to create a shared album for students (&/or their parents) to share their work with the teacher?!?! I have used Google Photos in my personal life for quite some time, and I love the sharing ability AND the commenting ability.

Next hurdle ... what about parents who don't have a Google account? Have no fear - our students all have Google accounts! Why not have the parents use the child's Google account to do this? No new accounts AND it will "live" with the child's school account for as long as necessary - even when we return to school.

It's definitely a different line of thinking ... and will take some work to set up, but I believe it's a doable option. Many adults are used to taking & sharing photos, so this borrows on that already learned skill. This also streamlines the sharing for the teacher - it's all in one spot. The commenting also provides evidence for feedback as well as notifications for both sides - home & school.

Now, I'm not one to throw ideas around without backing it up with some instruction/guide. I created a slidedeck to help the teachers and parents. Feel free to make your own copy or share it out as is. You will also want to check - like I did - that Google Photos is turned on for your students. 

I hope this provides an easy method of communication for teachers, parents, and students. The feedback the original teacher has already received has been positive. I know there will be hiccups along the way, but I'm excited to see how this goes!


Looking for a link to a View Only version? Please use "File --> Make a Copy" to make your own copy.

Want to look at the Template version? Please click on "Use Template" in the upper right corner to make it your own.

I'd love to hear how this goes for you if you choose to use it. And if I can be of help, please don't hesitate to comment below; contact me on Twitter (@kiefersj); or email me (sarah@techyoucando.com).


Sunday, March 29, 2020

Remote Learning By the Numbers You Can Do

W O W.

It's been a little more than 2 weeks since Governor DeWine ordered the closure of all schools in Ohio. I was sitting in the Curriculum Department when he made the announcement. I look back at that day & feel like it was surreal. I'll remember that day forever. We had been anticipating an announcement of some kind - but the swiftness was overwhelming. The next day was a pre-planned in-service day for my district and we pivoted from what we had planned on doing, to prepare for what it would mean to teach remotely.

Here I am, 2 weeks later. We used 2 calamity days and 8 days of remote learning. I can honestly say that nothing - and everything - in my teaching career has allowed me the strength to sit here and write this to you. I have no magical answers; I have no "right" answers; and I have no idea how much longer we will continue remote learning. But what I DO know is this:

  • I will not be broken by this.
  • I will be stronger because of this.
  • I will make mistakes and learn from them.
  • I will cry and dry my tears.
  • I will be upset - even angry. And then I will channel that anger into something productive.
  • I will see my colleagues create amazing digital lessons.
  • I will see students do some pretty cool things at home.
  • I will see my district leadership guide us through this time of uncertainty with grace and strength that even they didn't know they had.
  • I will see a change in education that will hopefully prove to be for the better. 
I know these things to be true even though all of this stems from something so unexpected, so strange, and so unwanted.


This week is spring break for me. And it's one more thing that will be pivoting. One more thing that will be changed. I had been looking forward to 5 days of being home while my family carried on with their normal lives. This was what I expected. Instead, I will work with my daughters on their schoolwork. I will be thankful my husband is still employed and has a job he is needed at. I will work on school "stuff" - even though I know I don't have to. I will also do some of the things I had planned previously ... and I'll get to that in a minute.

I have focused my writing on activities and lessons that you can take and do in your classroom. I don't share a lot about my personal life. But today I am going to open up a bit. I feel like I need to be more open. Contrary to what many might think, computers and technology aren't my whole life. I do unplug and I do have other hobbies. 

For one, running has been a major part of my life since college. I have completed several half-marathons and 5ks. I run 3 or 4 times a week. On the other days, I do a fast-walk or the Maxtrainer. I've also included planks to strengthen my core.

I journal daily. Not like the narrative type - I shared my journal style two weeks ago in "Uncertain Times You (& I) CAN Do." I have done this faithfully since late December. It has given me focus, routine, and a means to reflect. I am encouraging my daughters to do the same.

And I LOVE DIY. I love watching it and trying things on my own. I grew up watching "This Old House" and I still am a faithful viewer. While I do not have a huge repertoire of tools, I do own several and they come in handy quite often. And many assume my husband does the work, but he finds DIY frustrating and allows me to do it. He's MUCH better at the outside work. He loves taking care of our yard and plants and all of that. I have brown thumb. I couldn't identify more than a couple of flowers and 1 tree - my favorite, a Japanese maple. We balance each other well in this respect.

First completed floor
A handful of years ago, we ripped up the carpet and vinyl flooring on our first floor and replaced it with a click-together flooring. While we were mostly happy, we've realized it wasn't the best option for kids and dogs. We've sorely needed to replace carpet on our 2nd floor. Can you guess what I had planned for spring break? That is my big project. I am replacing all the carpet in our bedrooms, hallway, and closets. No small feat. It also allows me to work out some stress and frustration. We had the flooring picked out, so on weekends that might have been spent at soccer fields, I am spending it replacing the floors upstairs. So far, I'm proud to share I've completed 2 bedrooms, about half of the hall, and I'm heading into our youngest daughters bedroom today.

All of this leads me to the share I have for today. As I was working to figure out a cut around a doorway Thursday night, I started thinking about all the things I have/haven't done over these past two weeks. And with the "By the Numbers" template Ryan O'Donnell (@creativeedtech) shared a while ago as inspiration, I've created "Remote Learning By the Numbers ... So Far." 

Here is mine for the past two weeks. I am thinking I will update it again at some point. (Maybe while it's all over. Maybe after spring break. Maybe I won't.) It sure would be fun to see some others Remote Learning By the Numbers ... So Far. Please share yours! 


Would you like to use mine to make a copy for yourself? Feel free! Here is a link to my Google Drawing. You are welcome to make a copy & modify it to fit yourself.

If you have any questions or comments or if I can help, PLEASE reach out. Please comment below, reach out on the socials - linked to the above right.